
A couple weeks ago, Arrow Cabinets sent a call out on their blog for contest entries in their Yo-yo contest.
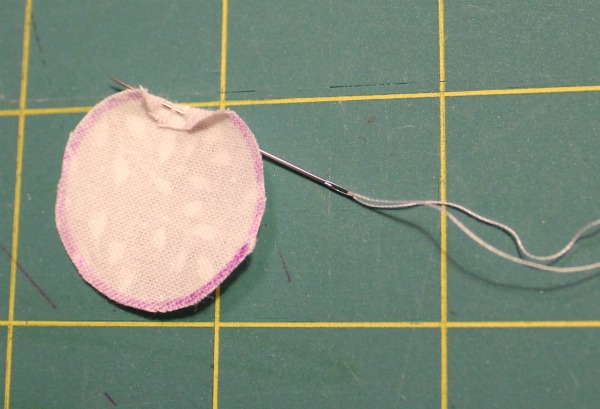
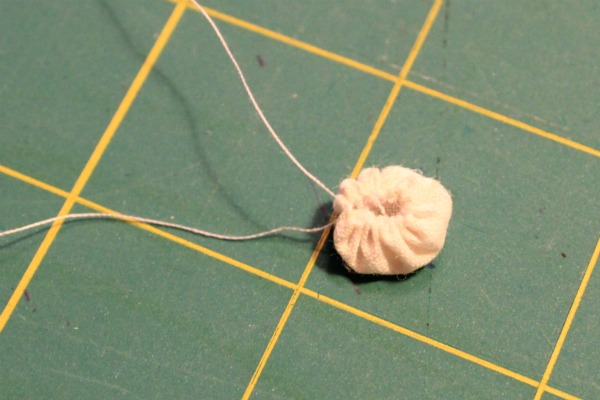
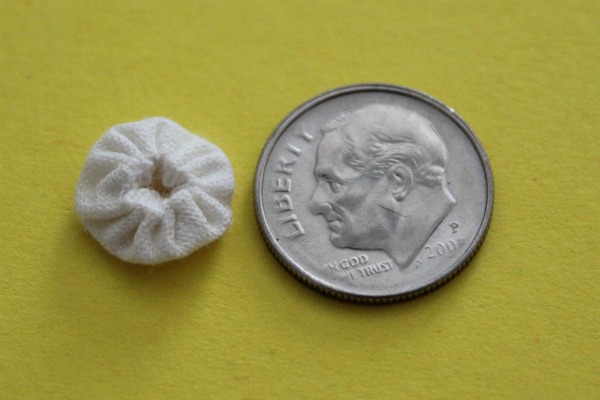
You might ask, what is a yo-yo? Essentially, it is a little gathered fabric circle. In the past, I’ve had absolutely no use for yo-yos. I’ve always thought they were very “granny” looking. Since I won the last Arrow contest with my cactus pincushion, I thought I would give it another go… with the true challenge being finding a way to make yo-yos look cute.
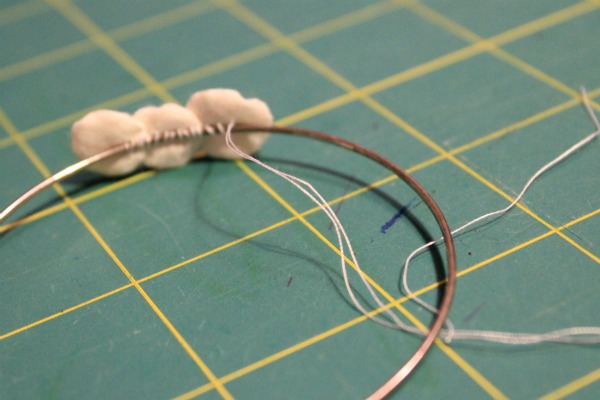
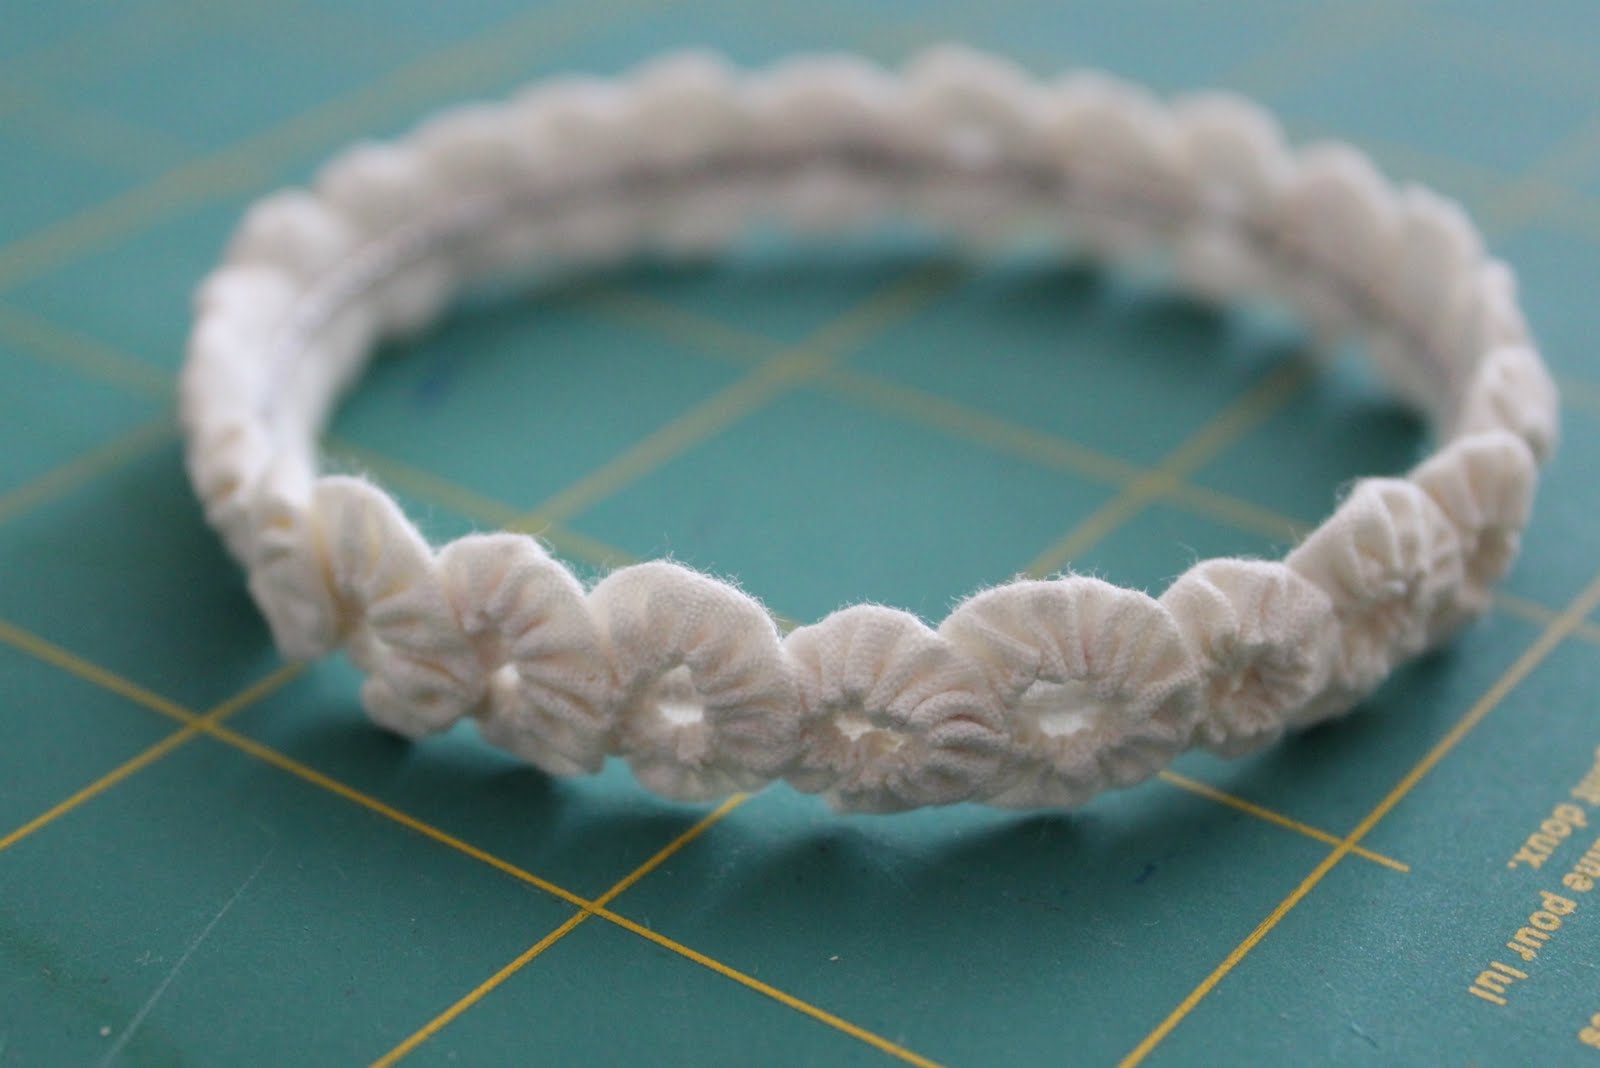
Each bracelet uses about 25 mini yo-yos, and took a couple hours to make. They require some tiny stitches and nimble fingers, but there is nothing especially tricky about making them.
If you want to make your own, here is a step-by-step tutorial that shows you how…
Supplies:
Scrap fabric
Fabric marking pen
Quarter
Needle & thread
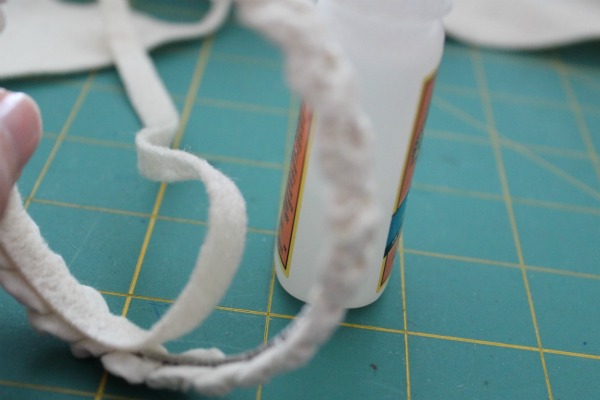
Bangle bracelet
Scrap of felt
Gorilla Glue


Finished… now time to make some more!
Click here to see all the Yo-yo Contest entries.
Always,
Linked in Blogland at:


Comments & Reviews
These are really cute! I will admit when you said yo-yo…I was thinking of the toy! How long did it take you to make these?
Yes, so that I can make it also! Because it really looks OK!
When I was a teenager I used to do head bands for my ponytails using the same technique. That’s a great activity I can do with my niece. She loves crafts.
This is so cute!
Wow, it’s a really cute bracelet!!! I will try this!
Oh, how cute! You always make these things look so simple. I am impressed.
These are so cute! Unfortunately I don’t have nimble fingers and can’t sew worth a darn so I’d have to perhaps e-mail a certain blogger and see if she’d be willing to make one for me. *ahem* Heehee.
Aww these are adorable!!!! These are so well done!!!
Very cute!!! You should submit to One Pretty Thing
Very cute!
Those are so pretty, but I would get frustrated after trying to make the first tiny yo-yo. I am so not crafty like that at all and I am totally jealous of crafty people like you.
You made the yo yo look modern by putting it on the bracelet. Great job!
These are too cute! Fun idea.
You make it look so easy! You are so talented! Love it!
I’m a new follower from the blog hop!
Hope you’ll hop by and visit my blog too!
Have a great Sunday!
nancy
http://stylendecordeals.blogspot.com/
Oh my gosh!!! The patience you must have to have made all these. Wow. I’m in awe!
Very late to the game here, but had to tell you what a cute idea this is!! So feminine without being all grandma-doilie-ish. Love it! Thanks for linking up. 🙂
These are adorable. Another cute use for the yo-yo. I used to think they were rather “Grannyish” too.
Umm, this is pretty much the coolest DIY I’ve found in some time. Thank you for adding another project to my list 🙂
SO creative and adorable! Great project. I just came across your site through Stumble Upon and now you’ve gotten a new follower. So glad to have found you!
~Jenna
http://www.sasinteriors.net
This is adorable! I want to add this to my to-make list, but not sure I would ever actually do it… lol. Too small and fiddly, and too much hand sewing for me. I’m spoiled by my machine I guess.
totally cute
Really pretty! Do you have any trouble with it twisting when you wear it? I love it!
LOVE THIS!!! My Nana and I used to spend HOURS making Yo-Yo’s, might have to make us both one of these!!
So that’s what a hand crafted yo yo looks like. It’s good actually, but I guess giving it some colors will make it more beautiful.
silver bullion uk
This is so cute! Yo-Yo’s look pretty easy to make…bet I could do it!
I bet you could do the same thing using ribbon or elastic instead of a bangle.